
Common causes of slippery sports surfaces and how to fix them
Common Causes of Slippery Sports Surfaces and How to Fix Them starts with understanding what has changed on the floor. A surface may feel slick because of contamination, moisture, a failing finish or a combination of several issues. You should temporarily restrict play if users cannot stop, turn or land safely. A measured inspection is safer and more useful than applying an untested product.
Dust, dirt and loose debris on the playing surface
Fine dust and grit reduce consistent contact between footwear and the floor. Dirt brought in through entrances can collect along the perimeter, beneath seating and around goal areas, while sweat can bind particles into a thin, slippery film. Begin by removing loose contamination with a clean, dry method before introducing water or detergent.
The common court causes guide also identifies dirt, worn finishes and moisture as frequent reasons for reduced traction. In your own hall, look for dull tracks, visible grit and areas that feel different from the surrounding surface. If the problem improves after dry removal, contamination rather than permanent floor damage may be the main issue.
Cleaning products that leave a greasy or waxy residue
A floor can become less grippy after cleaning if the detergent is over-dosed, poorly rinsed or not suitable for the finish. Some products leave a film that feels smooth underfoot, particularly when it mixes with sweat or moisture. Avoid adding polish or a stronger chemical simply because the surface looks tired; that can make diagnosis harder.
Use the flooring manufacturer’s guidance where available and keep a record of the product, dilution and equipment setting used. Correct chemical control matters because a clean-looking floor can still carry residue that changes surface friction. Test a small area first and compare it with an unaffected section before treating the whole hall.
Moisture, condensation and high indoor humidity
Dampness may come from wet footwear, cleaning water, spills, perspiration or condensation on a cool floor. High indoor humidity can also slow evaporation and alter how a timber or resilient surface feels during play. Check for a change in conditions after busy sessions, during warm weather and when doors are opened to humid outdoor air.
Do not allow play to resume while visible moisture remains. Improve air movement, deal with the source of water and use suitable drying equipment where needed. If the floor repeatedly becomes slick despite correct cleaning, environmental monitoring may reveal a pattern that a one-off wash will not solve.
Worn finishes, polishing errors and surface contamination
Protective finishes gradually wear in turning lanes, under basketball goals and in other heavily used areas. Incorrect polishing, incompatible coatings or embedded contamination can leave the floor uneven in appearance and traction. A worn surface may need more than cleaning, but recoating without preparation can trap dirt or create a new slick layer.
Compare high-traffic routes with quieter areas and inspect for flaking, bare patches, scratches or visible changes in sheen. Where the coating has failed, obtain a professional assessment before sanding or applying materials. The correct remedy depends on the floor construction, existing finish, damage depth and the performance requirements of the sports using the hall.
How to identify the source of a slippery sports hall floor
Before you plan slippery sports hall floor repair, establish where and when the loss of grip occurs. Walk the area when it is clean and dry, then compare the result with conditions during normal operation. Speak with cleaners, coaches and site staff, since each person may have noticed a different trigger. This simple evidence-gathering stage can prevent unnecessary replacement work.

Checking whether the problem is localised or widespread
Map the affected areas rather than relying on a general impression. A localised patch near an entrance may point to tracked-in water, while a consistent change across the court may suggest cleaning residue, humidity or finish wear. Use the same footwear and a cautious walking test, never a running or sliding test, when comparing zones.
Note whether the issue follows traffic routes, court lines, equipment storage or cleaning paths. Differences between the centre and edges can also indicate uneven application or drying. A simple floor plan marked with observations gives a contractor far better information than the description “the whole floor feels slippery”.
Assessing the floor’s finish, coating and wear patterns
Look at the sheen, colour and texture from several angles under the hall lighting. A glossy appearance is not proof of poor grip, but abrupt changes in gloss, visible wear and exposed substrate deserve attention. On timber floors, inspect joints and boards as well as the finish; on synthetic floors, check for lifting, tears or localised softening.
You should also consider the activity and users. A multi-sport hall must balance traction, surface stability and appropriate shock absorption rather than chasing a uniformly rough feel. The sports flooring services available from Complete Sports Flooring cover installation, refurbishment, line marking and scheduled maintenance, with systems described as compliant with EN14904 standards.
Reviewing cleaning methods, products and equipment
Ask for the written cleaning routine, including sweep frequency, detergent name, dilution, mop type and machine settings. Check whether dirty water is being spread across the court, whether mop heads are clean and whether the floor is being rinsed. A change in chemical or cleaning contractor often explains a sudden difference in grip.
Inspect equipment as well. Worn pads, overloaded scrubbers and ineffective water recovery can leave a residue or excess moisture behind. Keep product containers and instructions available so that the person investigating the floor can distinguish a material problem from a process problem.
Testing conditions before and after use
Record temperature, relative humidity, recent cleaning time, occupancy and any spills when the issue is noticed. Then repeat a cautious inspection after the floor has dried and the hall has returned to normal conditions. If traction changes with humidity or use, the remedy may involve environmental management as well as cleaning.
Use objective site information where possible, and arrange formal performance testing when the floor’s compliance or safety is in doubt. Never treat a short-term improvement after an improvised chemical as proof that the method is suitable for ongoing use.
Cleaning methods for restoring floor grip
Cleaning can restore traction when the surface is sound but covered by dust, sweat or residue. It should be controlled, repeatable and compatible with the flooring system. Work in manageable sections, protect the floor from unnecessary water and keep users away until the area is fully dry. If cleaning does not change the result, stop escalating chemicals and investigate the finish.
Removing dust and grit without spreading contamination
Start with a dry removal method that collects rather than redistributes particles. Use clean, suitable dust-control equipment and change or empty it when it becomes loaded. Pay particular attention to corners, under retractable seating, entrances and the edges of court markings.
Do not immediately follow a dirty dry mop with a wet mop that simply turns the collected grit into slurry. Remove loose material from the hall, then inspect the surface before washing. This sequence reduces scratching and limits the amount of contamination that the detergent must handle.
Choosing a suitable neutral floor cleaner
A neutral cleaner is often the sensible starting point for routine maintenance, provided it is approved for your particular floor and finish. The label, flooring specification and maintenance instructions should guide the choice. Avoid household degreasers, abrasive powders and unapproved polishes, as they may affect the coating or leave an unwanted film.
If the floor has a persistent build-up, a specialist may recommend a deeper clean with a controlled method. You should still test compatibility and remove the loosened residue thoroughly. A product that cuts through dirt but remains on the floor is not a successful solution.
Using the correct dilution, mop and scrubber settings
Measure detergent rather than estimating it. Excess chemical does not necessarily clean better, and it can increase rinsing time or leave residue. Choose a mop, pad or brush appropriate to the floor, use moderate pressure and avoid aggressive abrasion on a protective coating that is already thin.
A practical cleaning sequence helps staff work consistently:
- Dry-remove dust, grit and loose debris first.
- Dilute the approved cleaner according to its instructions.
- Work in small sections with clean water and controlled equipment.
- Recover or collect dirty water instead of allowing it to dry on the floor.
These steps are straightforward, but consistency is what makes the result repeatable. Record any change in appearance or grip and stop if the surface reacts unexpectedly.
Rinsing and drying the surface thoroughly
Rinsing removes loosened soil and detergent residue that could otherwise remain as a slick film. Use clean water and avoid flooding timber or seams. Water recovery should be efficient, with particular care around damaged areas and edges where moisture can sit unseen.
Allow enough time for the entire floor to dry before reopening the hall. Check corners, shaded sections and areas beneath equipment rather than judging dryness from the centre of the court. If the floor is still damp at the planned reopening time, delay use and revise the cleaning window.
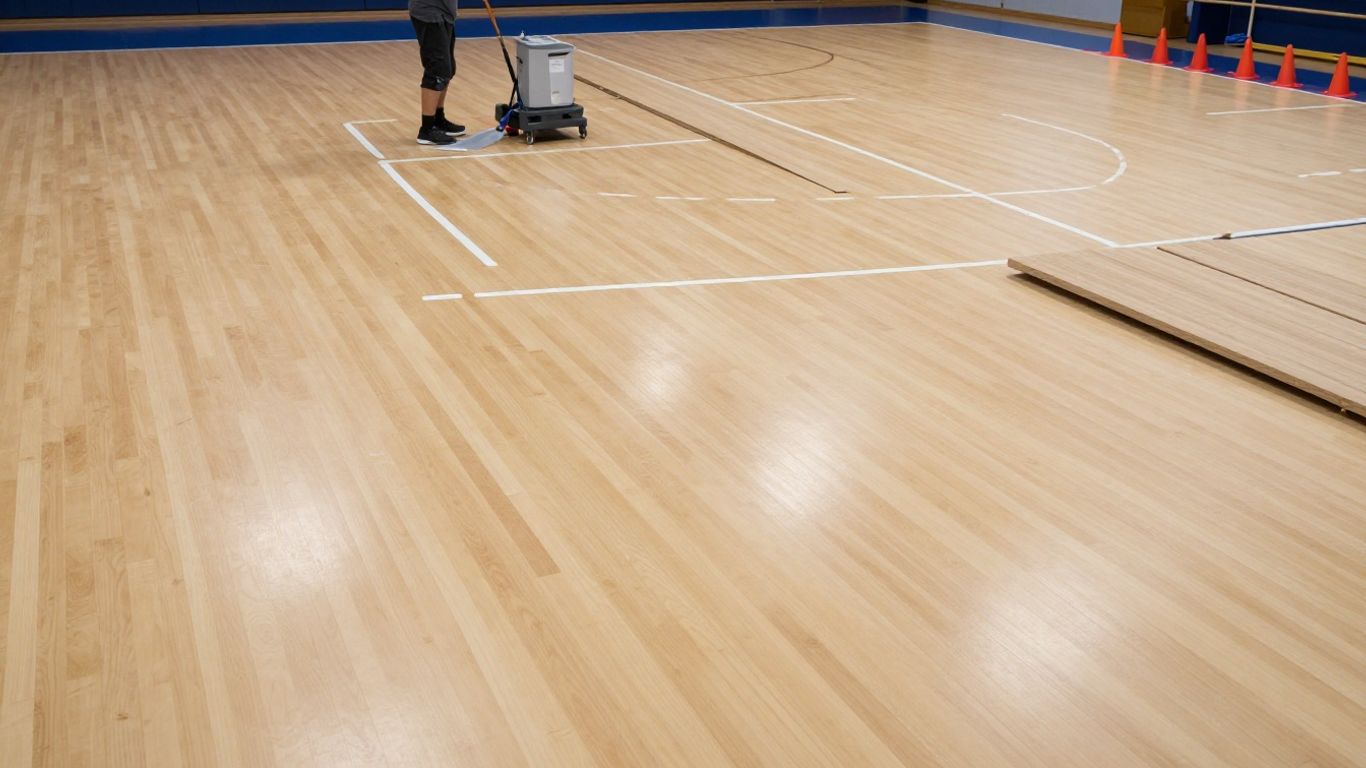
Repairing worn, damaged or contaminated sports flooring
When cleaning does not restore a consistent feel, the floor may require preparation or repair. The right intervention ranges from local treatment to full sanding and refinishing, depending on the condition of the finish and substrate. You should plan this work around closures, access, curing times and line-marking requirements. A technically suitable repair is of little value if the hall is reopened too soon.
When deep cleaning is enough to restore traction
Deep cleaning may be sufficient when the coating is intact and the loss of grip comes from embedded soil, sweat or incompatible residue. A specialist can assess a test area and compare it with untreated flooring before recommending a wider treatment. This approach limits cost and avoids removing sound material unnecessarily.
After cleaning, inspect the floor when fully dry and under normal lighting. If the original sheen, texture and traction return consistently, update the maintenance routine so the contamination does not build up again. If patches remain slick, move on to a finish and substrate assessment rather than repeating the same wash.
Preparing areas with worn paint or protective coating
Worn court paint and protective coating need careful preparation because loose material can compromise adhesion. The area may need cleaning, drying, feathering or other preparation specified for the existing system. Do not simply paint over a flaking edge or a greasy patch.
The repair should preserve clear line markings and the intended performance of the surrounding surface. Where several layers or previous treatments are present, document them before work begins. That history helps determine whether local preparation is appropriate or whether a broader refurbishment will produce a more even result.
Repairing scratches, flaking finishes and uneven patches
Scratches can collect dirt and water, while flaking finishes create an uneven transition that affects both appearance and use. Loose coating should be removed safely, and the underlying surface checked for movement, moisture or more extensive damage. Local repairs must be blended carefully so they do not create a sharp change in friction.
Uneven patches may indicate a deeper issue than surface contamination. If boards move, the subfloor is damp or synthetic material has lifted, a surface-only repair is unlikely to last. Arrange a specialist inspection where damage extends beyond the visible finish.
Recoating the floor without creating a slick surface
Recoating is a controlled flooring operation, not a quick way to make a court look newer. The existing finish must be compatible with the proposed system, and the surface must be clean, prepared and dry. Application thickness, curing conditions and the final performance should all be considered before the hall is returned to service.
Complete Sports Flooring provides sports court sanding and refinishing, including an EN 14904 retest as described on its refurbishment page. Its published refurbishment guidance also assesses finish wear, surface damage, structural movement and subfloor health before recommending refinishing or replacement. That kind of condition-led decision is preferable to applying a generic coating to an unknown floor.
Managing moisture and environmental conditions
Moisture control is part of floor maintenance, not merely a response to visible spills. Indoor sports halls can change quickly when many people are exercising, external doors remain open or warm air meets a cooler surface. Monitor conditions during the periods when slipperiness is reported and connect those readings with cleaning and occupancy records. Small operational changes may help, but persistent condensation needs a proper review.
Controlling condensation during humid weather
Condensation forms when moist air meets a surface cool enough for water to settle. You may notice it after a warm, humid day, particularly near entrances, external walls or poorly insulated areas. Keep the hall’s environment stable where possible and do not open the floor for play while a damp film is present.
If the pattern recurs, record humidity and surface conditions rather than relying on appearance alone. A facilities team can then adjust ventilation, heating or scheduling based on evidence. Flooring materials respond differently, so avoid assuming that one remedy suits every hall.
Improving ventilation and air circulation
Good air circulation helps moisture evaporate evenly and reduces stagnant pockets around walls, stored equipment and seating. Check that vents are unobstructed and that mechanical systems are operating as intended. Air movement should support drying without blowing dust across a newly cleaned court.
Coordinate ventilation with the cleaning schedule. Starting a session before the floor has dried, or introducing humid air through open doors, can undo otherwise careful work. Where the building system cannot maintain suitable conditions, discuss the problem with an environmental or flooring specialist.
Preventing wet entrances and tracked-in water
Entrances are a common route for rainwater, grit and damp footwear. Use effective matting, maintain it properly and inspect thresholds during wet weather. Place any temporary controls where they will not create a trip hazard, and remove standing water promptly using equipment suitable for the floor.
Give staff a clear response for spills and wet patches. The aim is to isolate the area, remove the water, clean any residue and confirm that the surface is dry before reopening it. Repeated entrance contamination may require changes to traffic flow as well as more frequent cleaning.
Allowing adequate drying time after cleaning
Drying time depends on the amount of water used, air movement, temperature, humidity and the floor material. Build a realistic drying period into the booking calendar rather than treating it as spare time between sessions. Check the full playing area, including edges and zones beneath portable equipment.
A hall that is technically clean but still damp is not ready for use. If bookings regularly leave no margin for drying, move cleaning earlier or adjust the method with professional advice. Protecting the reopening window is part of protecting users.
Preventing the sports hall floor from becoming slippery again
Once the immediate problem is resolved, prevention depends on disciplined routine and clear responsibility. Your maintenance plan should reflect traffic levels, sports played, floor type and the building’s environmental behaviour. It should also account for school holidays, leisure-centre peak periods and planned closures. A short record after each inspection can reveal gradual changes before they become a safety complaint.
Creating a consistent cleaning and maintenance schedule
Set out daily, weekly and periodic tasks with named owners and clear products. Include dry soil removal, spill response, damp inspection and a review of high-traffic areas. Staff should know the correct dilution and what to do if the floor does not respond as expected.
A planned maintenance arrangement can also coordinate deeper cleaning, inspections and refurbishment around operational demands. Complete Sports Flooring describes scheduled maintenance as part of its sports flooring services, alongside installation, refurbishment and line marking. Keep the schedule practical enough that staff can follow it during busy periods.
Using entrance matting and suitable footwear policies
Well-maintained entrance matting reduces the amount of water and grit reaching the playing surface. It works best when it is long enough for several footfalls, kept flat and cleaned or replaced before it becomes saturated. Check that mats themselves do not curl or move under traffic.
Footwear rules should be simple and sport-appropriate. Ask users to avoid outdoor shoes on the court and provide a clear route for dealing with visibly wet soles. These controls are especially useful during winter or when several activities share the same hall.
Recording inspections, spills and recurring problem areas
Keep a simple log of when slipperiness was noticed, where it occurred, what the floor had been exposed to and what action was taken. Add cleaning times, environmental conditions and reopening checks where relevant. This turns scattered observations into a useful maintenance history.
Review the log monthly or after a significant incident. Repeated problems in one zone may point to a leak, traffic issue or worn finish, while whole-floor changes may suggest cleaning or humidity. Share the record with any contractor so the inspection begins with evidence rather than guesswork.
Knowing when to call a specialist sports flooring contractor
Call a specialist when the problem persists after a controlled clean, appears across the hall, involves flaking or movement, or raises questions about compliance. You should also seek advice before sanding, recoating or changing the surface specification. A professional assessment can distinguish contamination from finish failure and identify work that needs a planned closure.
For London schools, leisure centres and commercial venues, London sports flooring support provides a route to local surveys across all 32 boroughs. Complete Sports Flooring has operated since 1994 and focuses on installation, refurbishment and maintenance for sports facilities. Ask for a written scope that covers preparation, materials, testing, drying, line marking and the expected return-to-use date.
Conclusion
A slippery sports hall floor is usually a maintenance, moisture or surface-condition problem that can be investigated methodically. Remove contamination, control drying, check the finish and repair damage with a system suited to the floor. By recording what you find and planning specialist work around closures, you can restore dependable traction without rushing into unnecessary replacement.
—Quick answers
Frequently asked questions
Dust, grit, sweat, cleaning residue and moisture are common causes. Worn finishes or poor drying can make the effect worse, so inspect the surface and recent maintenance routine together.
Yes. Too much detergent, an unsuitable product, dirty water or incomplete rinsing can leave a film. Excess water can also create a temporary damp surface that is unsafe to use.
Compare a carefully cleaned, fully dry test area with an untreated area using the same cautious walking check. If the difference is clear, contamination may be contributing, although persistent problems still need further assessment.
Only use a product specifically approved for the floor and its finish. Unapproved polish may alter surface friction or leave residue, so follow the flooring manufacturer’s maintenance guidance.
Refinishing may be appropriate when the protective finish is worn, damaged or contaminated beyond what cleaning can correct. A specialist should assess the finish, substrate, movement and the extent of damage first.
There is no single fixed time. Drying depends on water volume, ventilation, temperature, humidity and the flooring material; reopen the hall only when the entire playing surface is dry.
It can be. Loss of traction may affect safe use and the intended performance of the sports surface. If the condition is persistent or linked to a damaged system, arrange a professional inspection and any appropriate testing.