
Planning flooring projects around central London school operations
A school refurbishment has to fit around lessons, examinations, clubs, lettings and staff routines. Navigating Logistics for Flooring Installations in Central London Schools therefore starts well before materials arrive on site. You need a shared programme that connects the survey, specification, procurement, installation and handover stages. Early discussions with a specialist such as Complete Sports Flooring can help you assess the sports-specific requirements alongside the practical constraints of the building.
Coordinating surveys, term dates and restricted access
Begin with a survey that records room dimensions, existing floor build-ups, access points, loading limitations and any areas that cannot be disturbed. Compare the findings with the school calendar, allowing time for approvals and for conditions that may only become clear once the old surface is lifted. A short closure window is rarely enough if preparation, curing or line marking has been overlooked.
Ask the school to nominate one operational contact and one technical contact. That simple arrangement reduces conflicting instructions when the project moves from survey to installation. You should also confirm whether deliveries, noisy work or access through shared areas are restricted at particular times of day.
Mapping classrooms, corridors and specialist areas
A room-by-room map gives you a more useful basis for planning than a single floor area figure. Mark classrooms, circulation routes, changing rooms, kitchens, dining spaces, stores and sports halls separately, because each has different demands for wear, cleaning, moisture control and acoustic comfort. Where a school occupies a constrained urban site, vertical circulation and shared access routes can be just as significant as the rooms themselves; research into high-density school design illustrates why movement patterns deserve attention at the planning stage.
Record thresholds, door clearances, skirtings, floor boxes and fixed equipment. These details affect both the quantity of material and the sequence of work. They also help you identify where a temporary route or alternative teaching space will be needed.
Phasing work to keep teaching spaces operational
Phasing should follow how the school actually operates, rather than dividing the building into convenient but disruptive sections. You might complete a group of classrooms together, then move into corridors once furniture and teaching equipment have been relocated. Sports halls often need their own programme because subfloor preparation, surface installation, curing and line marking can impose a longer period without use.
Build in contingency for drying conditions, inspections and snagging. A practical phase plan should identify the hand-back date, the person accepting each area and the protection required before normal use resumes. A realistic handover date is more valuable than an optimistic completion promise that leaves staff arranging last-minute alternatives.
Allowing for safeguarding and contractor supervision
Contractors working in a school must understand the boundaries between construction activity and occupied teaching areas. Agree where operatives may enter, which welfare facilities they can use, how tools are secured and how movements are recorded. You should also decide who will escort visitors and who can stop work if pupils, staff or members of the public enter a controlled zone.
A written site plan can cover barriers, sign-in arrangements, emergency contacts and daily briefings. It should be updated when the work moves to another floor or access route. This is not bureaucracy for its own sake; it gives the school a clear way to maintain normal safeguarding responsibilities while the project changes around it.
Managing deliveries, storage and movement through busy urban sites
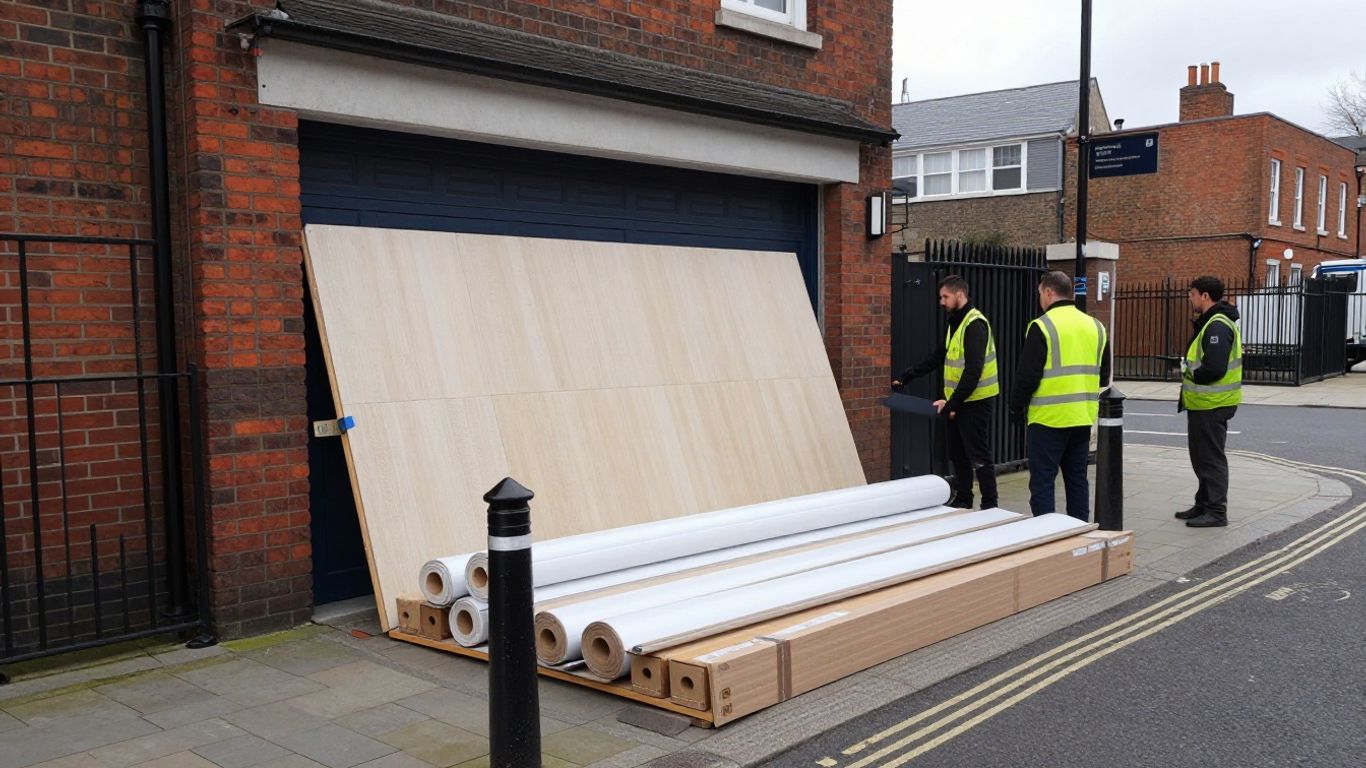
Central London deliveries are shaped by kerb space, traffic restrictions, neighbouring properties and the school’s own safeguarding controls. Flooring may arrive in rolls, boxes, boards, adhesives or finishing materials, each with different handling requirements. You need a delivery plan that connects the vehicle, time slot, unloading point and route into the building. That detail prevents a lorry from waiting outside while the school tries to clear a path.
Booking delivery slots and complying with site restrictions
Confirm the delivery address in practical terms, including the gate to use, the height or width of the entrance and the distance from the unloading point to the work area. Check local restrictions and the school’s permitted delivery times rather than relying on a postcode alone. If the building shares its frontage with residents or another public facility, include those interfaces in the plan.
Give the site team notice of the expected vehicle and the number of people unloading. A named contact should be available to open gates, check the consignment and direct the load. If a delivery is delayed, agree in advance whether it can wait, return to the depot or be rescheduled.
Choosing suitable vehicles for narrow streets and controlled zones
The right vehicle depends on street geometry as well as the volume of flooring. A smaller vehicle may be easier to position safely, while a larger delivery can reduce the number of visits if the site has enough loading space. Consider height limits, turning space, parking controls, bus routes and any clean-air or controlled-zone requirements before confirming transport.
For sports flooring, boards and specialist equipment may also require careful protection from impact and weather. The contractor should explain how the load will be secured and how it will be transferred from the vehicle. A delivery that is technically possible but leaves materials exposed in a public passage is not a workable delivery plan.
Protecting materials during temporary on-site storage
Materials need a clean, dry and secure holding area away from pupil routes and emergency exits. Check the manufacturer’s storage instructions, particularly for adhesives and products affected by temperature or moisture. Keep packs supported as required, avoid crushing edges and prevent unrelated trades from using the storage zone as a general work area.
Label each batch and record what has been delivered, inspected and moved. This makes it easier to identify shortages before installation starts. It also limits unnecessary handling, which can damage corners, roll ends and finished surfaces.
Moving flooring safely through occupied school buildings
Internal movement should be treated as a small logistics operation, not an informal carrying exercise. Establish the route, protect walls and door frames, and use handling equipment suitable for the load. Schedule movement outside busy changeovers where possible, with a spotter at blind corners and clear separation from pupils.
A short movement checklist is useful when several teams share the building:
- Confirm the route is clear and barriers are in place.
- Check that the load can pass safely through doors and corridors.
- Keep adhesives, tools and offcuts contained during movement.
- Clean the route before it is reopened to school users.
These measures keep the work moving without turning a delivery route into an uncontrolled hazard. They also give the facilities team a simple standard to apply each day.
Selecting flooring systems for different school environments
There is no sensible single flooring choice for every school space. A classroom may need comfort and sound control, while a sports hall needs an appropriate sports surface, shock absorption, friction and reliable line marking. Corridors, entrances and dining areas bring heavy traffic and frequent cleaning. You should specify by use, then check that transitions between systems remain safe and practical.
Matching materials to classrooms, corridors and communal areas
Start by describing what happens in each room: how many people use it, what footwear is common, whether wheeled equipment crosses it and how often it is cleaned. Carpet tiles can suit quieter rooms where acoustic control matters, while resilient flooring may be more appropriate for busy circulation or food-service areas. Sports halls require a system selected around the activities, performance expectations and subfloor condition.
Entrance zones deserve particular attention because grit and moisture can shorten the life of flooring further inside the building. Plan matting, thresholds and cleaning access as part of the floor package. A sound specification is not simply a list of attractive samples; it explains why each system belongs in that location.
Specifying slip resistance and wet-area performance
Slip risk changes with contamination, footwear, gradients and cleaning practices. Wet changing areas, shower approaches, kitchens and entrances should be assessed separately from dry teaching rooms. Specify a surface with suitable slip performance and make sure the installation details, including seams and junctions, support the intended use.
Ask how water will be controlled at edges, around drainage points and at doorways. Poor transitions can create trip points even when the main floor surface is appropriate. Your risk assessment should also cover temporary wetness during cleaning and the time needed before an area can be reopened.
Balancing acoustic control, comfort and durability
Noise travels quickly through schools, particularly where hard surfaces meet long corridors or open learning areas. Acoustic considerations should sit alongside durability rather than being treated as a decorative extra. In a sports hall, the surface must also provide the performance required for its activities without becoming uncomfortable or unpredictable underfoot.
Discuss impact, rolling loads, footwear and maintenance with the designer and installer. A softer or quieter material is not automatically suitable for heavy circulation. Conversely, a very hard-wearing surface may create an unpleasant acoustic environment if it is used without a broader sound-control strategy.
Considering cleaning routines and long-term maintenance
A floor should be maintainable with the school’s available staff, equipment and cleaning schedule. Ask what daily cleaning involves, which products are permitted and how stains, scuffs or damaged sections are dealt with. The answer may influence the choice of sheet material, modular tiles, resilient planks or a sports finish.
Set out maintenance responsibilities before handover. Include cleaning guidance, replacement stock, protection during future works and the point at which professional refurbishment should be considered. This approach helps you judge value over the life of the floor rather than only by the initial quotation.
Meeting compliance and health and safety requirements
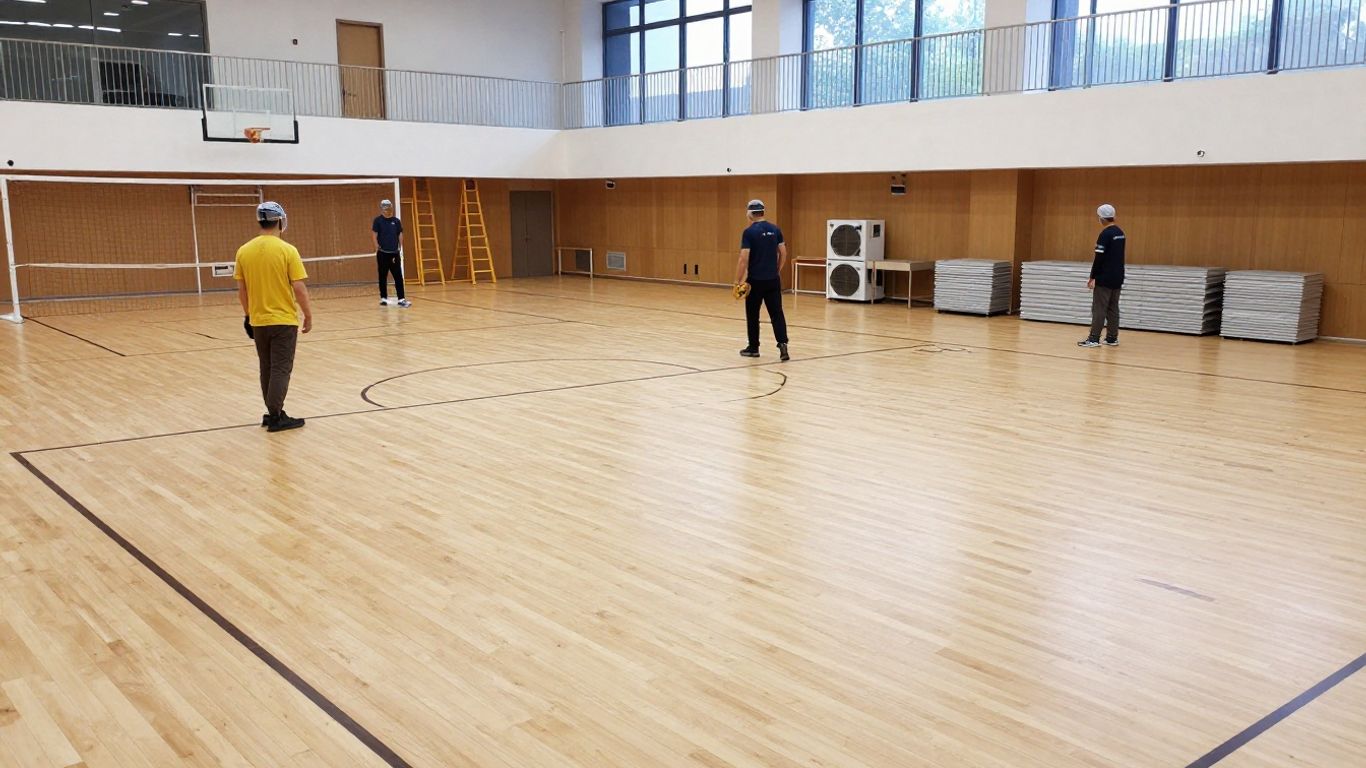
Compliance needs to be checked against the actual use and construction of the space. For a sports hall, EN 14904 is a central reference, while Sport England guidance and project requirements may also affect the specification. General school areas bring their own questions around fire performance, slips, indoor air quality and safe access. Keep the evidence in the project file so that decisions remain clear after the installation team has left.
Checking fire performance and relevant flooring standards
Ask for the relevant classification and supporting documentation for each proposed system, including adhesives and associated layers where required. Do not assume that a product suitable in one location has the same performance when installed over a different substrate. Sports floors should be checked against the applicable EN 14904 requirements, including the selected category where the design calls for an area-elastic system.
Complete Sports Flooring works with EN14904-compliant sports hall systems and considers Sport England guidance in its specialist sports flooring work. You should still require the project-specific specification, test information and installation details rather than treating a general statement of compliance as the complete record.
Managing dust, noise, fumes and ventilation
Subfloor preparation can create dust and noise at exactly the time a school is trying to maintain normal activity. Agree extraction, screening, ventilation and working hours before the first day. Products with odour or curing requirements may need a controlled period with no occupation, even when the visible installation appears complete.
Separate the work zone from occupied areas and inspect temporary seals regularly. Plan how waste leaves the building without crossing pupil routes. The school should know when ventilation is needed and who decides that a room is ready for use again.
Controlling risks around pupils, staff and visitors
The risk assessment should cover more than the installation room. It should consider altered routes, uneven temporary surfaces, trailing leads, stored materials, wet finishes and the possibility of unplanned access. Barriers need to be stable and understandable, with clear signage and a daily check by someone who knows the school.
Brief reception staff, caretakers and teaching teams about the changing boundaries. If a corridor must remain open, protect the edge and set a firm route for deliveries and waste. Small failures in separation can undo an otherwise careful installation.
Maintaining safeguarding, DBS and site-access procedures
Follow the school’s visitor policy, sign-in process and contractor identification requirements. Confirm in advance whether DBS checks or other pre-employment screening are required for the proposed workforce, and establish how escorted and unescorted access will work. Keep records current when subcontractors or delivery personnel change.
The site manager should have a daily list of who is present, where they are working and when they are expected to leave. Secure tools and materials at the end of each shift. These controls are especially important when installation spans several phases and different parts of the building remain occupied.
Coordinating installation with other trades and school teams
Flooring is often one part of a wider refurbishment, so your programme may depend on plastering, decorating, electrical work, joinery, furniture installation and cleaning. The floor cannot be judged in isolation if other trades still need to cross it or fix equipment above it. Coordination meetings should focus on access, dependencies and protection, not just on target dates. This is where an experienced sports flooring specialist can add practical value without taking over the school’s operational decisions.
Working around furniture, equipment and IT systems
Agree what the school will remove and what the installation team will handle. Desks, storage units, bleachers, sports equipment, cables and floor boxes can all affect preparation and access. Photograph existing arrangements where useful, then label items so they return to the correct rooms.
IT equipment and teaching technology need particular care because power, data and floor finishes can be interdependent. Keep sensitive equipment outside dusty areas and confirm who reconnects it. A clear responsibility matrix avoids the common assumption that the flooring contractor will move or reinstate every item on site.
Sequencing subfloor preparation, installation and finishing
The subfloor must be assessed and prepared before the final floor is installed. Moisture, contamination, unevenness and previous adhesive residues can affect the result, so allow time for testing, repairs and drying. On sports floors, the sequence may also include acclimatisation, installation of the system, finishing and line marking.
Use hold points for substrate approval, material inspection, completed installation and final cleaning. No following trade should enter simply because a surface looks dry. The agreed curing and protection period should be visible on the programme and communicated to everyone using the building.
Communicating with facilities managers and senior leadership
Facilities managers need technical information they can act on, while senior leadership often needs a concise view of disruption, cost and risk. Provide both without creating two conflicting versions of the project. A weekly update can cover completed areas, next activities, decisions required, access changes and any threat to the handover date.
Invite the school team to inspect representative completed areas early. This gives you a chance to resolve colour, transition or finish concerns before the same detail is repeated throughout the building. It also builds confidence among people who will later manage the completed floor.
Handling unexpected defects, delays and design changes
Existing floors rarely reveal every problem before lifting begins. You may find damp, damaged screed, unstable boards, hidden thresholds or services that were not shown on drawings. Agree a process for photographs, technical review, cost approval and programme impact before such a defect appears.
Do not allow an informal instruction to change the specification without recording it. The project manager should identify whether the change affects performance, compliance, warranty or maintenance. That discipline protects the school from an attractive short-term fix that creates a longer-term problem.
Choosing London school flooring contractors and controlling project costs
Price matters, but the lowest initial figure may not represent the lowest whole-life cost. You should compare what each quotation includes, from survey and preparation through protection, cleaning, testing and handover. For sports facilities, technical competence is particularly important because performance and compliance cannot be inspected reliably from appearance alone. Complete Sports Flooring has operated since 1994 and serves educational, leisure and commercial sports facilities, giving you a relevant benchmark when assessing specialist experience.
Assessing relevant education-sector experience
Ask contractors for examples of work in occupied schools or similarly controlled facilities. Look for evidence that they can manage term dates, safeguarding, shared access, sports programming and communication with facilities teams. A contractor who understands the material but not the building’s daily life can still cause avoidable disruption.
For sports halls, ask about EN14904 compliance, shock absorption, surface friction, slip resistance, line marking and maintenance. Complete Sports Flooring focuses on sports hall flooring installation, gymnasium refurbishment and maintenance, so its documented scope fits projects where those issues are central. Keep the questions tied to your project rather than accepting broad claims about every type of flooring.
Comparing surveys, specifications and like-for-like quotations
A fair comparison begins with a common scope. Give each bidder the same drawings, room schedule, access assumptions, working hours and preparation requirements. Then check whether each price includes removal, disposal, moisture testing, subfloor repairs, trims, transitions, protection and final cleaning.
The following comparison points can expose differences that are easy to miss in a headline figure:
- The proposed system and performance requirements for each area.
- Preparation allowances and the treatment of unknown substrate defects.
- Delivery, storage, movement and protection arrangements.
- Programme assumptions, exclusions and school liaison responsibilities.
- Testing, certification, line marking and handover documentation.
Once these items are visible, you can discuss genuine value rather than negotiating over an incomplete number. Ask for variations to be priced using the same labour and material assumptions as the original quotation.
Reviewing warranties, maintenance advice and aftercare
A warranty is useful only when its scope, exclusions and maintenance conditions are understood. Check who carries out remedial work, how defects are reported and whether specified cleaning products or inspections are required. For a sports floor, ask how line marking, refinishing and future repairs interact with the warranty.
Handover information should include product details, cleaning guidance, completion records and any relevant compliance documentation. Store it where the facilities team can find it, not only in an email attachment held by the project manager. Good aftercare gives you a practical route to protect the investment.
Measuring quality, programme performance and handover readiness
Define acceptance criteria before installation starts. These may cover appearance, tolerances, transitions, cleanliness, line accuracy, moisture results, documentation and the condition of adjacent surfaces. Inspect in good light and test the areas under the activities for which they were designed.
Complete Sports Flooring describes its work in terms of meticulous installation, technical expertise and maintenance support; you can test those qualities through the survey, method statement, site conduct and handover process rather than relying on marketing language. A successful project is ready for school use, properly documented and clear about the next maintenance step.
Conclusion
When you plan access, storage, phasing, compliance and communication as one joined-up process, flooring installation becomes far easier to control. The right contractor will help you translate the school’s operational needs into a suitable specification and a realistic programme, while leaving you with a safe, maintainable and properly documented floor.
—Quick answers
Frequently asked questions
Begin several months ahead where possible, especially if the work must fit into a school holiday or coordinate with other trades. The required lead time depends on surveying, procurement, approvals, material availability and the amount of subfloor preparation needed.
Not necessarily. Holidays reduce pupil traffic, but a short break may not allow enough time for preparation, curing, testing and snagging. A carefully phased programme during quieter teaching periods can sometimes be more practical.
Confirm vehicle dimensions, delivery windows, parking or loading restrictions, access gates and the internal route before ordering materials. Use a named site contact and have a contingency plan for delays or missed slots.
The choice depends on the sports, usage level, subfloor, required shock absorption, friction, slip performance and applicable standards. A specialist assessment should establish the appropriate system and performance category.
Separate the work area with stable barriers, control contractor access, secure tools and materials, and keep alternative routes clear. Daily checks and communication with staff are needed because hazards can change as the work progresses.
It should clearly identify the proposed system, preparation, removal and disposal, delivery, installation, protection, testing, finishing, line marking where relevant, cleaning, exclusions and handover documents. Like-for-like information makes competing quotations easier to assess.
Request product and cleaning guidance, warranty details, compliance records, inspection results, maintenance recommendations, completion photographs where useful and a list of unresolved items. The facilities team should know who to contact if a defect appears after occupation.