
Assessing the needs of a small Wandsworth community centre
Maximising Small Community Spaces in Wandsworth with Multi-Sport Line Marking starts with understanding how the building is used, not simply measuring the playing area. A centre may host children’s sessions in the afternoon, adult sport in the evening and events or community activities at weekends. The flooring specification therefore needs to support changing demands without making the room difficult to manage. Early decisions about access, storage and circulation can prevent expensive alterations later.
Measuring available space and identifying layout constraints
Take accurate measurements of the clear floor area, wall projections, columns, door swings and fixed heating or ventilation equipment. Record ceiling height as well, particularly if basketball or other overhead equipment is being considered. You should also identify where people enter, where equipment is brought in and whether any emergency routes cross the proposed court area.
A scaled drawing is more useful than a single length-and-width measurement. It lets you test court layouts, safety margins and furniture positions before any markings are applied. In a compact venue, a few centimetres around a doorway or structural post can determine whether a particular layout remains practical.
Understanding the activities and age groups the facility will serve
Speak to the centre’s organisers and regular users before selecting sports. Children’s coaching, recreational football, netball, basketball, exercise classes and informal play can all place different demands on the surface. Younger users may need generous run-off space and forgiving impact performance, while competitive players may be more sensitive to grip and ball response.
Consider footwear, session length and the number of simultaneous users. A floor that works well for one organised activity may be less suitable when the room is quickly reset for another. The best brief describes the real timetable rather than an idealised list of sports.
Balancing capacity, accessibility and spectator circulation
A court is only one part of a community facility. You need room for wheelchair users, spectators, coaches, benches, changing access and safe movement between the entrance and the activity zone. Avoid allowing chairs, bags or loose equipment to create narrow pinch points beside the playing area.
It is sensible to draw circulation routes separately from playing lines. That makes it easier to see where people may cross the floor during a session and where a waiting area could be placed without interrupting play. Clear circulation matters just as much as the dimensions of the court itself.
Reviewing existing flooring, subfloors and drainage conditions
Before overlaying or replacing a floor, check its condition rather than assuming the visible surface tells the whole story. Look for unevenness, loose boards, cracking, moisture, failed joints and areas that have previously been repaired. Outdoor or semi-enclosed spaces also need a proper review of falls, drainage and water movement.
Where the existing sports hall floor may be recoverable, Wandsworth flooring refurbishment can be considered as an alternative to full replacement. A survey, moisture testing and an itemised assessment help establish whether sanding, refinishing or other refurbishment work is appropriate. That decision should follow evidence from the building, not the appearance of the top layer alone.
Choosing sports flooring for flexible community use
The right sports flooring gives the centre a dependable base for regular activity while remaining manageable between bookings. Indoor halls, outdoor MUGAs and shared-use rooms have different exposure, drainage and performance requirements. You should compare systems against the timetable and the building’s construction, rather than choosing solely on initial price. A well-matched surface can also reduce disruption caused by premature repairs.

Comparing indoor and outdoor flooring systems
Indoor sports halls generally allow closer control of moisture, temperature and cleaning, so timber or synthetic systems may be assessed for their sports performance and maintenance needs. Outdoor areas must cope with rain, temperature changes, drainage and more variable footwear. The specification should make clear whether the proposed system is intended for internal or external use.
If the room is occasionally opened to outside conditions, ask how moisture will be managed during cleaning, deliveries and seasonal changes. The subfloor and perimeter details are just as relevant as the visible playing surface. A technically suitable surface can still fail if water is allowed to remain beneath or around it.
Selecting surfaces for grip, impact absorption and ball response
You should assess slip resistance and shock absorption alongside ball response. Players need predictable traction when stopping or changing direction, but excessive friction can also affect movement and comfort. Impact performance matters for repeated activity, especially where children, older users or long sessions are part of the programme.
Ask for the performance information that relates to the intended sports and the relevant specification. A surface that feels comfortable during a short inspection may behave differently under repeated use, dusty footwear or varied cleaning regimes. Trials, samples and a clear technical discussion are preferable to relying on colour or appearance.
Matching flooring types to multi-sport requirements
A multi-sport room needs a compromise that is deliberate rather than accidental. Basketball may require consistent ball response, football sessions may bring heavier scuffing, and community events may involve furniture or non-sport footwear. You should rank these demands and identify which activities are frequent, occasional or non-negotiable.
For a sports hall in Wandsworth, Complete Sports Flooring provides installation, refurbishment and line marking services, with sports hall flooring solutions described as EN14904 compliant. That documented scope is relevant when you are comparing options for a school, leisure centre or other shared facility. It still remains your responsibility, with the project team, to confirm the proposed system suits the building and programme.
Considering durability, cleaning and long-term maintenance
Maintenance begins with the daily routine. Establish which cleaning equipment is available, who will operate it and how quickly spills or marks can be dealt with. Check whether the surface needs particular detergents, pads or restrictions on equipment with hard wheels.
A practical maintenance plan should also allow for inspections after busy periods. Note changes in gloss, joints, surface wear and line visibility, then address small defects before they become reasons to close the room. Durability is not just a material property; it depends on cleaning, footwear, equipment handling and timely repairs.
Planning multi-sport line marking in a compact space
Line marking is where a flexible layout becomes legible to users. Several sports can share one floor, but only if the markings are accurate, visually distinct and placed within safe playing limits. The design should be agreed on a scaled plan before work begins. This is also the point to resolve conflicts between official dimensions and the available room.
Combining markings for basketball, five-a-side football and netball
Start by placing the sport with the greatest spatial demand, then test how the other markings sit around it. Basketball key areas, football boundaries and netball circles can overlap visually, so their relationship needs to be considered rather than added one sport at a time. Where a full-size layout will not fit, the drawing should state clearly what is reduced or adapted.
Use the same reference points throughout the plan. This helps installers set out lines consistently and makes future repairs easier. For broader guidance on setting out several sports, you can review these professional court marking considerations while keeping the final design specific to the centre’s measurements.
Using colour coding to distinguish different sports
Colour can make a busy floor easier to understand, particularly for children and occasional users. Choose a restrained palette with enough contrast against the base surface, and assign each sport a consistent colour across boundaries, circles and key lines. Avoid using so many colours that the floor becomes visually noisy.
Discuss visibility under the actual lighting conditions. A line that looks clear in daylight may recede under artificial lighting or when the floor is dusty. A simple key on the centre’s operating drawings can help staff explain the layout without adding signs to the playing surface.
Managing overlaps, run-off areas and safety zones
Not every line should be treated as a playing boundary. Leave suitable space beyond active markings for stopping, turning and retrieving equipment. Pay particular attention to walls, radiators, posts and doors, since a technically correct court can still be unsafe if it ends too close to a hard obstruction.
The design should show run-off areas and no-standing zones, not just the lines themselves. If an overlap makes one sport difficult to read, consider whether a different orientation or a reduced court would produce a safer result. A little less usable area may be worthwhile if it makes the room easier to supervise.
Deciding between permanent and temporary line marking
Permanent markings suit a centre with a stable sports programme and frequent use. Temporary solutions may be useful where the room changes regularly for assemblies, classes or events, although they still need to remain secure, visible and free from trip risk. The choice should reflect how often the layout changes and how much staff time is available for resetting it.
Ask how each option will be cleaned, removed and renewed. Temporary tape or modular markings are not automatically simpler if they lift or require frequent replacement. Conversely, permanent paint may be the better operational choice when the sports programme is predictable.
Making the most of MUGA and shared-use layouts
A MUGA or shared-use room works best when every element has a planned place. The playing surface, goals, hoops, storage and pedestrian routes should be considered as one arrangement. This approach helps you protect the floor and turn the room around quickly between activities. It also keeps community use realistic rather than purely theoretical.
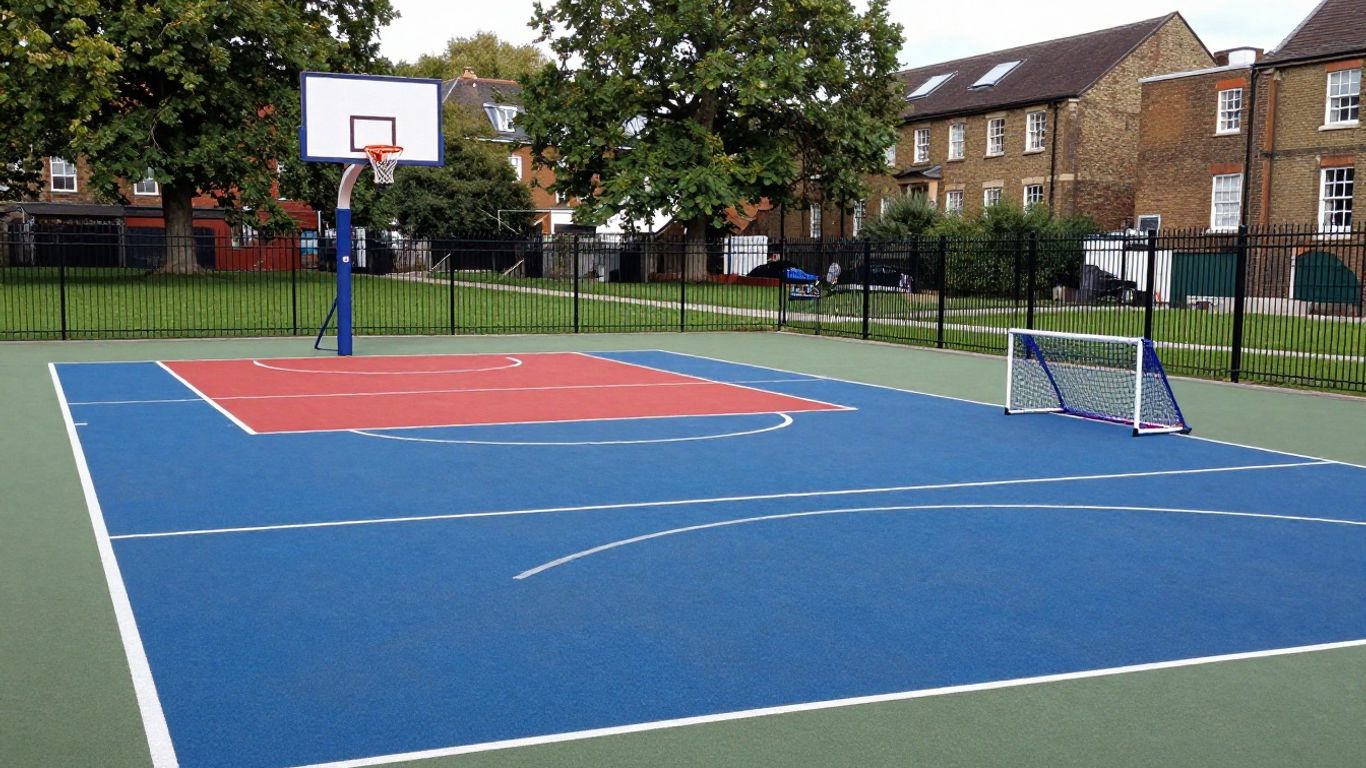
Designing efficient court dimensions for small sites
Begin with the activities that need the most room and establish the minimum safe envelope around them. Then test smaller training zones, half-court arrangements or cross-court play where appropriate. A compact layout can support useful sessions without pretending to offer the same capacity as a full competition venue.
Include the position of doors, fencing and lighting columns in the drawing. In an outdoor MUGA, drainage falls and edge details may limit orientation. A measured plan allows you to make those compromises deliberately and explain them to users.
Positioning goals, hoops and other removable equipment
Removable equipment should be stable during use, easy to move and simple to store. Check the route from storage to the playing area, including thresholds and door widths. Equipment should never need to be dragged across the surface if doing so could mark or damage it.
Hoops and goals also need clear exclusion zones when they are not in use. If equipment is left beside the court, it can narrow circulation and create a collision point. Assigning parking positions on the plan makes the room safer and quicker to reset.
Creating adaptable zones for sport, events and community activities
A shared facility may need to change from sport to a meeting, dance class or local event within the same day. Define zones for activity, seating and equipment rather than relying on staff to improvise each time. Floor protection should be specified where tables, staging or other heavy items are likely to be used.
This flexibility is easier to maintain when the markings remain readable but not overwhelming. Staff can use portable barriers or lightweight furniture to divide the room without fixing more obstacles to the floor. The result is a venue that serves its wider community without losing its sports function.
Using storage solutions to keep the floor clear
Storage is often the overlooked part of a small-centre refurbishment. Use vertical space where possible, protect equipment from damp and provide enough room for balls, nets, posts and cleaning tools. Heavy items should have a defined location and a safe handling method.
Keep a short inventory and check it periodically. Missing wheels, damaged frames or abandoned bags can quickly turn a tidy store into a hazard. Good storage protects both the floor and the time available between bookings.
Meeting safety and accessibility expectations
Safety needs to be built into the specification, not added after the lines are painted. You should consider the surface, equipment, lighting, ventilation, boundaries and how people reach the activity area. The centre also needs procedures that staff can follow consistently. A clear design makes those procedures easier to apply.
Providing suitable slip resistance and shock absorption
Choose a surface with performance characteristics appropriate to the sports and users. Slip resistance should remain predictable during normal cleaning and use, while shock absorption can help manage the repeated loads associated with running, jumping and changes of direction. The right balance depends on the system and the activities, so ask for relevant technical evidence.
Do not overlook the effect of contamination. Dust, moisture and unsuitable cleaning products can change how a floor feels underfoot. A written cleaning regime should form part of the handover rather than being left to guesswork.
Reducing trip hazards around markings, joints and equipment
Inspect transitions, board joints, access covers and any repairs before the room is reopened. Markings should be flush and sound, with no lifting edges or unexpected ridges. Equipment bases, cable routes and temporary barriers need the same attention.
Walk the complete user route, from entrance to changing area and court. This often reveals hazards that are not visible when you inspect only the centre of the playing surface. Repeat the check after equipment has been positioned for a normal session.
Planning inclusive access for wheelchair users and spectators
Allow enough width for wheelchair movement, turning and passing, and avoid making accessible routes cross the busiest playing zones. Spectator seating should not obstruct doors or emergency access. If the centre serves mixed-age groups, provide a layout that works for children, carers and less mobile visitors together.
Accessible use is more than reaching the floor. You should consider sightlines, rest points, storage heights and whether staff can move equipment without creating a barrier. Involve regular users in reviewing the proposed arrangement before installation.
Addressing lighting, ventilation and boundary protection
Even lighting helps users read markings and judge the ball, while good ventilation supports comfort during active sessions. Check glare, shadows and light levels at the points where players turn or receive a pass. Outdoor facilities also need careful attention to fencing, gates and nearby hard surfaces.
Boundary protection should not narrow the usable space unnecessarily. Where posts or walls are close to play, consider padding and supervision arrangements as part of the overall risk assessment. These details contribute to a facility that feels calm and usable rather than cramped.
Managing installation in a busy community setting
Installation has to fit the centre’s operational reality. A project may involve deliveries, preparation, flooring work, line marking, curing and cleaning, all while regular users are waiting to return. Agree responsibilities and access arrangements early. This reduces the chance that a finished floor is damaged during the final stages of refurbishment.
Preparing the subfloor before sports flooring installation
Subfloor preparation may include cleaning, levelling, moisture checks and repairs to the existing base. The required work depends on what the survey finds, so a contractor should not treat every room as identical. A smooth, stable and suitably dry base supports the performance and lifespan of the finished system.
Protect adjacent corridors, doorways and stored equipment during preparation. Dust and debris can travel beyond the room, particularly in a centre that remains partly open. Agree how waste will be removed and how the area will be secured each day.
Scheduling work around centre bookings and local users
Build the programme around closures, school holidays, regular leagues and community events. Shorter access windows may require phased work, but flooring and coatings also need uninterrupted periods for installation and curing. A realistic calendar is safer than promising a quick return that leaves insufficient time for the surface to settle.
Discuss deliveries and loading restrictions before the start date. In London, narrow access, parking controls and neighbouring properties can affect the sequence of work. A clear logistics plan helps the centre tell users exactly when rooms and routes will be unavailable.
Coordinating line marking with other refurbishment tasks
Line marking should follow the relevant flooring preparation and finishing stages, not compete with them. Coordinate it with painting, lighting, electrical work, wall protection and cleaning so that other trades do not cross a newly finished surface. The order should be recorded in the project schedule.
For a Wandsworth sports hall, local sports flooring installation is a relevant service reference when discussing installation, refurbishment and line marking together. Keep the project brief precise about which tasks are included, who supplies equipment and when the room must be handed back.
Checking workmanship, curing times and handover requirements
Before handover, inspect line accuracy, surface finish, joints, transitions and equipment positions under the centre’s normal lighting. Confirm curing times and any restrictions on footwear, cleaning or moving heavy items. Staff should know when the floor can accept full use, not just when the final contractor leaves.
Request maintenance guidance, product information and a record of agreed defects or follow-up work. A short familiarisation session can prevent avoidable damage during the first busy weeks. Handover is complete when the centre can operate the room confidently and safely.
Controlling costs and protecting the finished facility
A sensible budget compares the full operating picture, not just the installation figure. Preparation, access, line marking, downtime, cleaning equipment and future repairs can all affect value. You should separate essential safety or performance work from improvements that can be phased later. This makes funding conversations more transparent.
Comparing installation costs for different flooring options
Ask for itemised quotes that distinguish the existing-floor preparation, surface system, markings, protection, access and handover. Two apparently similar prices may include very different levels of preparation or aftercare. You should also check whether the proposed system is suitable for the actual sports programme.
The cheapest surface can become expensive if it needs frequent repairs or causes longer closures. Conversely, a premium specification may not be justified if it exceeds the centre’s use and maintenance capacity. Comparing whole-life practicalities supports a more defensible decision.
Prioritising upgrades when the budget is limited
If funding is tight, start with defects that affect safety, moisture control, structural stability or basic sports performance. Next, improve markings, storage and accessibility where these changes materially improve daily use. Decorative changes can usually wait.
A phased plan should not create conflicting work later. For example, confirm that future equipment, lighting or access improvements will not require newly marked areas to be cut or moved. Staging works carefully protects the money already spent.
Building a cleaning and inspection routine
Assign responsibility for daily checks and record what is inspected. A simple routine can include the following:
- Remove loose dirt and spills promptly.
- Check for lifting edges, damaged joints and worn markings.
- Inspect goals, hoops, wheels and protective pads.
- Report moisture, unusual movement or changes in grip.
This list is deliberately practical: staff can adapt it to the surface manufacturer’s instructions and the centre’s opening pattern. Regular records also help you spot recurring problems before they become a major closure.
Refreshing worn markings and repairing damaged surfaces
Line visibility usually changes gradually, so compare busy areas with less-used sections during inspections. Worn or damaged flooring should be assessed before a local repair or re-marking is specified. Matching materials and preparation properly is essential if the repair is to remain stable.
A planned refresh can often be arranged during a quieter period. For facilities considering a broader sports hall programme, Complete Sports Flooring services cover installation, refurbishment and line marking; the exact scope should be confirmed in the quotation. Keep records of repairs so future contractors understand the floor’s history.
A final cost review should include the likely closure period and the resources needed to maintain the finished room. That gives trustees, council teams or centre managers a clearer basis for deciding which improvements deliver the most useful change.
Conclusion
A compact Wandsworth community centre can offer more sport and more community value when its flooring, line marking, equipment and access routes are designed as one practical system. Start with a measured survey and a realistic user brief, then choose performance, safety and maintenance requirements that the centre can support over time. Careful scheduling and a disciplined handover will help protect that investment once the room is back in use.
—Quick answers
Frequently asked questions
The suitable option depends on whether the space is indoors or outdoors, which sports are played, the condition of the subfloor and how the room is maintained. Compare grip, shock absorption, ball response, moisture resistance and whole-life cost rather than choosing by appearance alone.
One surface can support several sports when its performance is suitable and the markings are planned carefully. You should check the available dimensions, safety zones and user expectations, as a compact shared layout may need training or recreational dimensions rather than full competition layouts.
There is no universal number. The practical limit depends on the room size, the sports involved, line colours, visual clarity and the amount of run-off space left around each activity. Too many overlapping lines can make the facility harder to use safely.
A MUGA can be useful where a centre needs one area to serve several activities. Its suitability depends on drainage, fencing, lighting, equipment, surface performance and how the space will be supervised and maintained.
Plan clear routes, adequate turning space, unobstructed entrances and seating that does not block circulation or emergency access. Consider equipment storage, sightlines, rest points and the needs of wheelchair users, carers, children and spectators together.
The programme varies with the floor system, subfloor condition, room size, line marking and curing requirements. Existing bookings, delivery access and other refurbishment tasks can also affect timing, so the contractor should provide a project-specific schedule.
Use the recommended cleaning method, remove spills promptly and inspect lines, joints, transitions and equipment regularly. Re-marking or repairs should follow an assessment of the underlying surface, especially where wear, moisture or movement may be contributing to the problem.